- Connect to the same local network as the Chameleon PWS
- Open preferred internet browser
- Go to admin.chameleon-cloud.com and log-in
- Find location, by Client Name/Location/Gateways (look for "inGate")
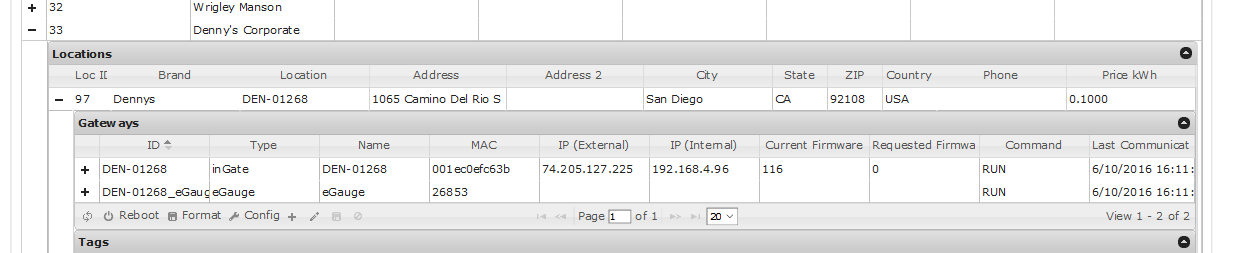
- Note "IP (Internal)"
- Open a second tab in internet browser
- Type in "IP (Internal)" IP address in web address of browser
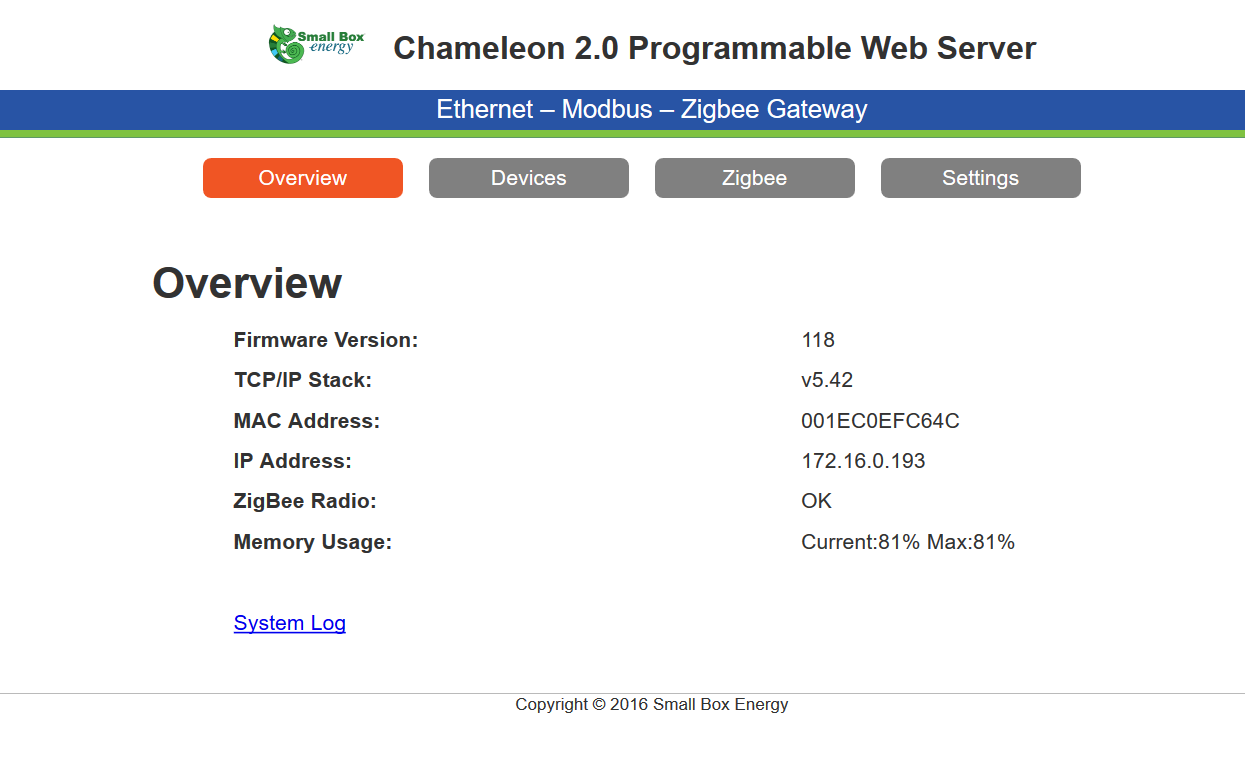
- Click on "Settings" tab
- User name "admin" and password "admin"
- Click "ZigBee Reset"
- Note "Radio Status" and "Channel"

- Click "Reset". Channel will cycle from current channel, to 0, to a new channel.
- At this point all of the thermostats have been removed from the ZigBee network
- Reboot PWS by pressing reboot button, once, on the web server located between the power input and communication terminations
- Refresh page on internet browser
- Click on "ZigBee" tab
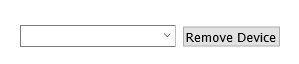
- Scroll down to the bottom of the page to select thermostats to remove from the PWS.
*NOTE* This process is a little touchy, but with some refreshing and patience you should be able to get all of the current thermostats removed - Go to the nearest thermostat to the PWS
- Press on the "Menu" button
- Press and hold the two middle buttons
- Press the down arrow until you see "ZigBee Install", select
- When prompted "Add thermostat to ZigBee network" press the "UP" arrow to select "Yes" .
- Check your "ZigBee" page to ensure the thermostat has connected, It should pop up within a few seconds after install.
- Continue process until all thermostats are added and reporting to the PWS.
Comments
0 comments
Please sign in to leave a comment.